

Статьи
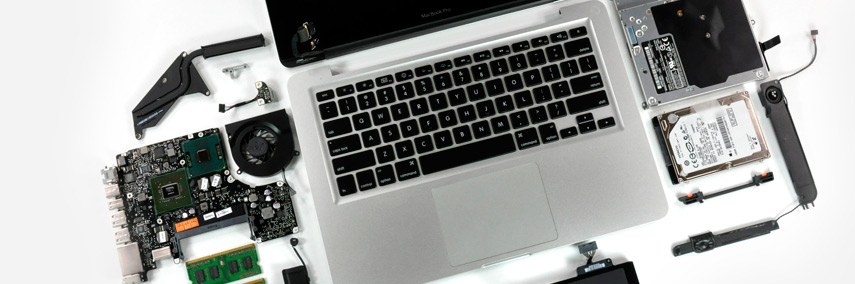
Инструкции по разбору MacBook Pro 15 (3 часть)
Apple Remote
Remote wont communicate with system applications such as iTunes or iPhoto, or
with the optical drive.
Make sure of the following when using the (infrared) Apple Remote:
- You are within 30 feet of the front of the computer.
- You have an unobstructed line-of-sight to the front of the computer.
- You are pointing the lens end of the Apple Remote directly at the front of the computer.
- The computer is powered on and awake.
- The “Disable remote control infrared receiver” checkbox in the Security pane of System
Preferences is NOT checked.
1.Make sure the active application works with Apple Remote. Apple Remote uses Front Row,
and from Front Row it can access DVD Player, iPhoto, iTunes, and QuickTime Player.
2.Make sure the remote is paired with the computer. Access the System Preferences/Security
pane and check “Unpair” if available. Close the Security pane, and re-pair the Apple Remote
with the computer. See Knowledge Base article 302545.:
3.Use a digital camera to test your Apple Remote.
If you have a digital camera or DV camera with an LCD display, you can use it to see if your
Apple Remote is emitting a signal. Infrared beams are invisible to the human eye, but most
digital cameras and video cameras use Charged-Coupled Device (CCD) chips or image
sensors that are sensitive to infrared light.
To use a camera to test your Apple Remote, follow these steps:
• Turn on your digital camera or DV camera and remove any lens cover.
• Point your Apple Remote toward the display latch button.
• Press and hold the Menu button on the remote while looking at your camera’s LCD display.
• If you see a faint blinking light coming from the Apple Remote in the camera’s LCD, then
the remote is working properly.
• If you don’t see any blinking light in the camera’s LCD, replace the battery in your Apple
Remote and then test it again with your computer
4.Replace Apple Remote battery. See Knowledge Base article 302543: How to replace the
Apple Remote battery.
5.Replace Apple Remote.
Infrared Board
Supported applications do not respond to input from the remote control.
Make sure Disable remote control infrared receiver checkbox is not checked.
1.If Unpair is available in the Security pane of System Preferences, another Apple Remote may
be paired to the computer (pairing allows only one Apple Remote to control the computer).
2.To delete a pairing between the remote and the MacBook Pro, click Unpair. (You may have to
enter your Administrator password to make changes in the Security pane.) For further
instruction, consult Knowledge Base article 302545: Pairing your Apple Remote with your
computer.
3.Perform the checks above under “Apple Remote” to verify that the Apple Remote is
functioning correctly, and retest.
4.Check that the infrared board cable is connected to the hard drive fex and infrared board.
5.Verify that the infrared sensor can be seen in Apple System Profler. Open Apple System
Profler and click on “USB” section. If you don’t see it, replace the infrared board and retest.
6.Replace the hard drive fex and retest.
7.Replace the logic board.
Built-in iSight Camera
The built-in camera is not recognized.
1.Boot the MacBook Pro to the desktop and launch iChat AV. Note: You do not need to be
connected to a network to use iChat AV to troubleshoot. Verify that the correct versions of
Mac OS X and iChat AV are installed. Reinstall or update software as needed.
2.Open the iChat AV preferences and click on the ‘Video’ icon. Verify whether the camera is
recognized by the iChat AV software. Is the camera recognized?
3.Check the camera connection to main logic board.
4.Check the camera connection to the camera board (in the display assembly).
5.Replace the display assembly.
Camera image quality poor
- Verify that the lens assembly for the iSight camera is clean. Fingerprints and other
contaminants can afect image quality. Clean the lens using a lint free lens cleaning cloth
being while being careful not to scratch the lens. Verify that there is sufcient lighting to
produce a good quality image.
- Lighting which is comparable to that found in a well lit ofce will product a good quality
image. If possible, avoid having a brightly lit background. Difused lighting is preferred over
direct lighting. Launch iChat AV and open the iChat AV preferences. Click on the ‘Video’ tab. Is
the video quality acceptable?
Yes: The camera is functioning normally. The image quality problems may be caused by
bandwidth limitations when using iChat over the internet. Instruct the customer to use the
iChat AV connection doctor feature to verify that there is sufcient bandwidth to have a
video iChat session without a signifcant degradation of image quality.
No: The camera may not be functioning normally. Replace display assembly and retest.
Camera recognized but no audio
1.Open the System Preferences window and click on Sound. Verify that the built-in internal
microphone has been selected as the device for sound input. Verify that the volume settings
(on the slider bar) are appropriate.
2.Launch iChat AV and open the iChat AV preferences. Click on the ‘Video’ icon. Speak into the
microphone while monitoring the microphone level indicator. If line meter responds, it was a
settings problem.
3.Check that the microphone is plugged in.
4.Replace the microphone assembly.
The camera is recognized but the built-in microphone’s audio quality is poor.
1.Open the System Preferences window and click on Sound.
- Verify that the internal microphone has been selected as the sound input port.
- Verify that the input volume settings are appropriate. Use the volume level meter to verify
settings.
2.Open iMovie and create a new project. Click on the Audio button and record a sound
sample. If audio quality is fne, it was a settings problem.
3.Check that the microphone is plugged in.
4.Replace the microphone assembly.
Keyboard
No response from keys on the keyboard
1.Remove any connected peripherals and eject any ExpressCard.
2.If only numbers show up, check if NUM lock (F6) is engaged.
3.Go to Apple System Profler and look at the USB bus. If you see Apple internal keyboard /
trackpad, go to step 6.
4.Attach an external USB keyboard. If it doesn’t work, go to step 6.
5.Turn of the computer. Check the keyboard fex cable connection to the trackpad and the
trackpad fex cable connection to the main logic board (especially check connectors for
damage).
6.Start up from the MacBook Pro Mac OS X Install 1 DVD that came with the computer (hold
down the “C” key during restart, if possible) to verify that it is not a software problem.
7.Replace keyboard.
8.Replace top case.
9.Replace logic board.
No keyboard illumination
1.Go to the Keyboard system preference pane and make sure the “Illuminate keyboard in low
light conditions” check box is checked. Cover the left and right speaker grills with your hands.
Note: The keyboard illumination is not bright enough to be seen in most well lit spaces. In
order to view the keys being illuminated, the ambient light needs to be dim.
2.Check the keyboard backlight fex cable connection to the top case fex cable.
3.Replace keyboard.
4.Replace top case.
5.Replace the left ALS board.
6.Replace logic board.
Keyboard is partially illuminated.
- Check the keyboard backlight cable connection to the top case fex.
- Replace keyboard.
- Replace top case.
Microphone
The microphone is not working
1.Check the Sound system preference pane and verify that the selection under the Input tab is
for the built-in microphone.
2.Check the signal level and level meter and adjust the gain.
3.Reset PRAM (shutdown the computer, press the power button, then hold down the Option-
Command-P-R keys simultaneously until you hear the startup chime at least one additional
time after the initial startup chime).
4.If there is no sound output from the internal speaker nor is the microphone working, verify
cable connections.
5.Replace the microphone assembly.
6.Replace left I/O fex cable.
7.Replace the left I/O board.
8.Replace the logic board.
Modem (External)
Note: MacBook Pro does not have a built-in modem. Apple ofers an optional external USB
Modem.
No modem dial tone
1.Check that the correct modem is selected in the Network Port Confguration section of the
Network system preferences.
2.Verify known-good analog (not digital) telephone line.
3.Verify known-good RJ-11 telephone cable.
4.Verify RJ-11 cable is not plugged into Ethernet port (should not be physically possible with
this MacBook Pro).
5.Verify RJ-11 telephone cable is frmly installed in the modem port.
6.Inspect RJ-11 connector for pin damage. If damaged, replace modem.
7.Open Apple System Profler, and under the Hardware tab look at USB . It should show the
modem presence by indicating Apple External Modem.. If not visible, start checking modem
USB connection.
8.Update system software.
9.Try a known-good Apple USB modem in all USB ports. If it does not work in either of the two
left USB ports, replace the left I/O board. If it does not work in the right USB port, replace the
logic board.
Modem does not respond (can hear dial tone)
1.Check that the correct modem is selected in the Network Port Confguration section of the
Network system preferences.
2.Check that the modem application is properly confgured.
3.Open Apple System Profler, and under the Software tab look at Extensions. Check to see that
the MotorolaSM56K and AppleI2SModem Family fles are listed and loaded. If not, restart the
system and check again. If still not visible, replace system software.
4.Open Apple System Profler, and under the Hardware tab look at USB. It should show the
modem presence by indicating Apple External Modem. If not, start checking the modem
USB connection.
5.Replace Apple USB Modem.
6.Replace logic board.
Modem intermittently disconnects or low performance
1.Verify known-good RJ-11 telephone cable (for example, the retaining clip is not broken of)
and check that it is frmly installed when used. If telephone cable is bad, replace it.
2.If the issue happens with only one particular phone line, but not another, the problem may
be an issue with that particular phone line. Under bad line conditions, try setting the modem
script to start with a slower connect rate such as “Apple Internal 56K Modem (v.34).”
3.If the customer indicates the system disconnects under very high CPU loads such as burning
DVDs and/or working with video editing software such as Final Cut Pro, try connecting the
modem without any application running and see how the modem performs. Use Knowledge
Base article 106642: Mac OS X: Using Apple PPP Test Server to test the modem. If OK,
suggest to the customer to use the modem with less applications running simultaneously.
4.Replace Apple USB modem.
5.Replace the logic board.
Optical Drive
Optical drive not recognized
- Make sure the optical drive is a cable select drive set as a slave (1).
- Make sure the optical drive fex cable is undamaged and properly installed. If bad, replace.
- Replace optical drive.
The optical drive does not accept CD or DVD discs (mechanical failure)
1.Verify disc is not warped and is a 12 cm circular disc.
2.Check that a small disc is not stuck inside, or other foreign objects. Remove drive from
system to extract disc.
3.Verify disc is pushed almost all the way into the slot.
4.Check that the optical drive fex cable is undamaged and properly installed. If damaged, try
replacing the fex cable.
5.Replace optical drive.
The optical drive does not eject CD or DVD discs
1.Verify disc is not in use by quitting any applications that may be using the disc.
2.Press and hold Media Eject key at top right corner of keyboard. If that does not work, hold
down Function (fn) key and Media Eject key.
3.Drag disc icon to trash or select it and press Command-E.
4.Choose Restart from Apple menu while holding down trackpad button.
5.Reseat the optical drive mechanism. Make sure the drive is oriented toward the back of the
computer, and that all four corners are seated, so that the drive sits fat in its bay.
6.Replace optical drive.
The disc icon does not show up on desktop, or a dialog box appears to initialize
disc, when inserting a read-only disc
- Verify the correct type of disc is being used.
- Use Software Update system preference pane to check if there is updated frmware.
- Try cleaning the disc. If it is dirty or scratched, it may not mount.
- Try a diferent disc.
- Replace optical drive cable.
- Replace optical drive.
Diffculty writing to optical media
1.Verify the correct type of disc is being used.
2.Try a diferent brand or speed of CD-R disc.
Note: Some brands of 24x or 32x CD-R media may not work with the SuperDrive.
Note: There are two factors in the ability for the optical drive to write to media.
- First, there are varying qualities of blank optical media. Some media are made to such low
specifcations that the ability for the drive to write to it is marginal. There are variations in
optical media even under the same brand. Some brands source their optical media from a
variety of manufacturers, so there may be variations in the quality.
- Second, an optical drive that supports writing to a CD-R/RW or DVD-R/RW disc requires
a special writing algorithm for discs from diferent disc manufacturers. There are hundreds
of disc manufacturers, it is impossible to implement writing algorithms for each disc
manufacturer. Usually, drive manufacturers implement special writing algorithms for discs
from major disc manufacturers. For discs that are not supported by the drive with special
writing algorithms, the drive will use a generic writing algorithm to write the disc. In this
case, the writability and readability may not be optimal.
3.Replace optical drive fex cable.
4.Replace optical drive.
Ports
A USB port is not recognizing devices
1.Shut down the computer; then press the power button to start the computer.
2.Use Software Update system preferences to verify that the latest software is installed.
3.For USB, test ports with an Apple keyboard or mouse. If the left port is not recognized check
the left I/O fex cable’s condition and connection.
4.If the left I/O fex cable is fne, replace the left I/O board for the left USB port. For the right
USB port, replace the main logic board.
5.Use Apple System Profler to verify that the computer is recognizing the bus. If not, replace
the logic board.
A USB device not recognized by computer
Note: If you are trying to use a serial device with a USB/Serial adapter, check with the
manufacturer of the adapter for compatibility.
1.Shut down the computer; then press the power button to start the computer.
2.Verify that the current driver for the device is installed.
3.If a camera, turn on camera after initiating download with camera application.
4.Try the other USB ports.
5.Try a diferent USB device on same port.
6.Eliminate chain by plugging in only one peripheral.
7.Try known-good Apple USB keyboard or mouse to verify the port is working properly. If the
left port is bad, check the left I/O board fex cable and connections. If the right port is bad,
check the backup battery fex cable and connections.
8.If the left I/O fex cable is fne, replace the left I/O board for the left USB port.
9.If the right port is bad, replace the main logic board.
A FireWire port is not recognizing devices
Note: In FireWire Target Disk Mode, MacBook Pro cannot be mounted on systems with Mac OS X
10.3.9 or earlier. Refer to Knowledge Base article 303118: Intel-based Macs: About using Target
Disk Mode with Mac OS X 10.3.9 or earlier.
1.Test the FireWire port by connecting to another computer using FireWire Target Disk Mode.
Refer to Knowledge Base article 58583: How to Use FireWire Target Disk Mode.
2.Verify that drivers are installed properly for third party, if needed.
3.Make sure the cable is frmly attached.
4.Try a diferent cable.
5.If self-powered make sure that the power supply is connected and the device’s LED indicates
it is getting power.
6.Replace logic board.
Power Adapter
The power adapter LED does not turn on
1.Confrm the power adapter is connected to a known-good outlet.
2.Try replacing the AC plug or the AC power cord. If the adapter works replace the appropriate
plug or cord.
3.Check the pins in the power adapter’s DC plug for pins that are stuck down.

If pins are stuck down, try cleaning the contacts.
Debris removal should be done with a soft, non-electrostatic generating (non-plastic bristle)
brush. A tool such as a cotton swab may introduce foreign material that will cause the pins
to seize up. If the pin has become stuck, try working the pin to release it.
If the LED on the DC cord does not turn on, there may be contamination in the computer
port. The contact pins can be dirty. It can be cleaned with a soft brush. Do not use liquid.
4.In addition, foreign material may be pulled in which covers the contacts or prevents the DC
plug to seat enough for the sense pin to connect to the system.

5.Check if pins are missing or bent. Replace the power adapter
6.Check the power port on the computer for contamination which prevents the pins to make
contact. It can be cleaned with a soft brush. Do not use liquid.
7.Remove the battery and connect the power adapter. If the adapter turns on and boots the
system, replace the left I/O board.
Sound
No sound is heard and the Speakers section of the Sound system preference pane
indicates an external device is plugged in (to the headphone jack or USB ports)
1.If there is nothing plugged into the headphone jack or USB ports, under the Output tab of
the Sound system preference pane should be set to the internal speakers.
2.If not, and if nothing is plugged in, try plugging in headphones or external speakers. Restart
the computer. Remove the device.
3.Reset PRAM. (Press the power button, then hold down the Option-Command-P-R keys until
you hear the startup chime at least one additional time after the initial startup chime).
4.If the system continues to indicate a phantom device is plugged into the system, replace left
I/O board.
5.Replace logic board.
No sound from speaker(s)
1.Use Software Update to verify that the latest audio update has been installed.
2.Press the F3 key (with the fn key pressed and then not pressed) to verify that mute mode is
not enabled.
3.Press the F4 or F5 key (with the fn key pressed and not pressed) to check the volume setting.
4.Verify that no external speakers or headphones are plugged in.
5.Check the speakers tab on the Sound control panel to confrm that the software is correctly
seeing that there are no external speakers or headphones connected.
6.Shut down computer and restart.
7.Reset PRAM. (After restart, hold down the Option-Command-P-R keys until you hear the
startup chime at least one additional time after the initial startup chime).
8.Verify that the speaker cable is connected properly to left I/O board.
9.Check speaker cable. Verify left and right cable connections.
10.Verify with headphones or external speaker. If audio is heard, replace speaker assembly.
11.Replace left I/O fex cable.
12.Replace left I/O board.
13.Replace the logic board.
Distorted sound from speakers
1.Verify sound is correct with external speakers/headphones. If sound is correct, check speaker
wire and connections.
2.In Sound system preference pane, check balance.
3.Compare same sound with two diferent units to make sure that sound is actually distorted.
4.Check speaker wire. If damaged, replace speaker assembly.
5.Replace left I/O fex cable.
6.Replace logic board.
Trackpad
The cursor does not move when you are using trackpad
1.Verify that no USB device is connected.
2.Boot from the Software Install and Restore DVD to verify that it is not a software problem. If
the trackpad works, restore the system software.
3.Reset the power manager. See new procedures under the “Resetting the Power Manager
(SMC)” heading in the Hardware Troubleshooting Tools and Tips section.
4.Check trackpad fex cable connection to the logic board.
5.Replace top case.
6.Replace logic board.
The cursor intermittently does not move or moves erratically
Notes:
- User must touch with the surface of only one fnger at a time and point directly down on the
trackpad surface.
- When running Apple Hardware Test or Apple Service Diagnostic, the trackpad will respond in
very small movements of the cursor. This behavior is normal.
1.Clean trackpad surface (with computer of, using a non-static-inducing material).
2.Completely shut down, then press the power button to start the computer.
3.Reset the power manager. See new procedures under the “Resetting the Power Manager Unit
(SMC)” heading in the Hardware Troubleshooting Tools and Tips section.
4.Make sure power adapter is using the AC power cord, not the duckhead. If the intermittent
behavior goes away, recommend using the AC cord to provide a ground path for static to go.
5.Disconnect the power adapter,and run on battery power only. If problem goes away, replace
power adapter.
6.Place the MacBook Pro Mac OS X Install 1 Disc in the optical disc drive, press the start button
and hold down the “C” key. Check the cursor movement, to see if the problem is software.
7.Check trackpad fex cable connection to the logic board.
8.Replace top case.
8.Replace logic board.
Video
No display, or dim display, but computer appears to operate correctly
1.Remove any connected peripherals.
2.Make sure F1 key is not stuck down.
3.Press the F2 key (with the fn key pressed and not pressed) to increase the screen brightness.
4.Reboot the computer—hold down the Control and Command keys and press the Power
button to restart the computer. Or press and hold the Power button for 5 to 10 seconds to
shut down the computer, then press the Power button to restart. Let the system run for an
hour, so the panel can warm up.
5.Try connecting an external display to check for intact video signal. If no external video
appears, skip to step 10 below. Otherwise proceed to next step.
6.Verify inverter cable and LVDS cable connections are seated properly and that the cables are
not damaged.
7.Replace inverter board.
8.Replace the display rear housing (which includes the inverter cable assembly, or replace
separately if available).
9.Replace LCD panel.
10.Replace logic board.
Computer appears to work, but there is no video on an external device connected
to the S-video/Composite port of the optional DVI to Video Adapter
1.The device must be connected to the S-video/composite port while the MacBook Pro is
sleeping or of for the device to be recognized.
2.Verify monitor that is used in testing is known-good and is supported by this computer.
3.Try diferent DVI-to-Video Adapter.
4.Replace logic board.
No video on external VGA device connected to the external monitor (DVI) port
1.Verify monitor that is used in testing is known-good and is supported by this computer.
2.Try another DVI-to-VGA adapter cable.
3.Restart the computer and test again.
4.Replace logic board.
No display, or dim display, but can display external video
1.Remove any connected peripherals.
2.Try adjusting the brightness using the F2 function key.
3.Open Display system preference panel and check brightness. If works, replace keyboard.
4.Check connection of the inverter cable to the main logic board.
5.Check inverter cable connection to the inverter board and the inverter to the LCD cable
connection.
6.Replace inverter board.
7.Replace display rear housing (which includes the inverter cable assembly, or replace
separately if available).
8.Replace display assembly.
9.Replace logic board.
Display has repetitive patterns or shifting color pattern
- Check for the latest system software update.
- Check the LVDS connection is fully seated on the logic board.
- Replace the logic board.
Display has permanent vertical or horizontal lines.
- Check for the latest System software update
- Replace display panel.
- Replace logic board.
Misc. Symptoms
The Date and Time settings reset repeatedly
Note: Resetting the power manager or PRAM resets the date and time. The MacBook Pro uses a
non-rechargeable lithium battery.
1.Do a backup battery test:
• Set the date and time.
• Perform a Shut Down from the Apple menu.
• Remove the main battery and disconnect the power adapter for 10 minutes.
• Connect the power adapter, insert the battery, and power on the computer.
• If the date and time were lost the backup battery may be dead or discharged.
• Remove main battery from the unit and leave it plugged in for at least 5 hours.
2.Replace backup battery.
3.Replace the logic board.
Feet came off the bottom case
Replace the missing foot or feet.
Sleep LED does not come on when lid is closed
1.Put the computer to sleep using the menu option. If the sleep LED goes on, there is a
problem with sensing the closed display. If the LED does not go on, skip to step 3.
2.With the display housing removed, check the sleep magnet location on the LCD panel: (See
the LCD Panel chapter in the Take Apart section of this manual.)
• If it is not positioned correctly, reposition it. Polarity makes a diference.
• If the magnet is missing, replace it with a new magnet.
3.Check that the sleep LED is plugged into the logic board.
4.Connect a USB mouse. Short the power on pads on the logic board to boot the system and
use the mouse to sleep from the menu. Measure the voltage at the LED connector. If power
is present, replace bottom case.
5.Replace logic board.

Screw Chart

Аренда и подмена
Предлагаем услугу аренды Macbook и iMac. Предоставляем аппарат на подмену на время ремонта.
Курьерская служба
Сохраним ваше время и силы, курьер заберёт на ремонт и доставит восстановленное устройство.
Гарантия до 12 месяцев
Уверены в качестве выполняемого ремонта и используемых комплектующих.
Компонентный и модульный ремонт
Выполняем компонентный ремонт, что дешевле. Также можем заменить целиком модуль.
Инженеры с большим опытом
У нас все прозрачно и честно
Спросите любого:
КОМАНДА MACPLUS
Советы экспертов: Как правильно выбрать сервис?
Никогда раньше не обращались за ремонтом электроники?
Не знаете с чего начать? В первую очередь - не переживать! Признаки хорошего и качественного сервиса видны сразу. Мы подготовили инструкцию для тех, кто ищет мастерскую или сервисный центр по ремонту Apple


Где отремонтировать Macbook, iMac и iPhone
Чек лист по выбору надежного
сервисного центра по ремонту техники Apple
Если компания на рынке уже много лет, и она успела зарекомендовать себя как эксперта, к ней обращаются, о ней пишут, ее рекомендуют. Мы знаем о чем говорим, так как 98% поступающих устройств в СЦ восстанавливется.
Нам доверяют и передают сложные случаи другие сервисные центры.
1. очереди не будет (или она будет минимальной) - вашим устройством займутся сразу.
2. вы отдаете в ремонт Macbook эксперту именно в области ремонтов Mac. Он знает все секреты этих устройств
Чтобы вы представляли, что именно вам нужно.
Проблему постараются решить. В большинстве случаев по описанию можно понять, что случилось и как устранить неисправность.